
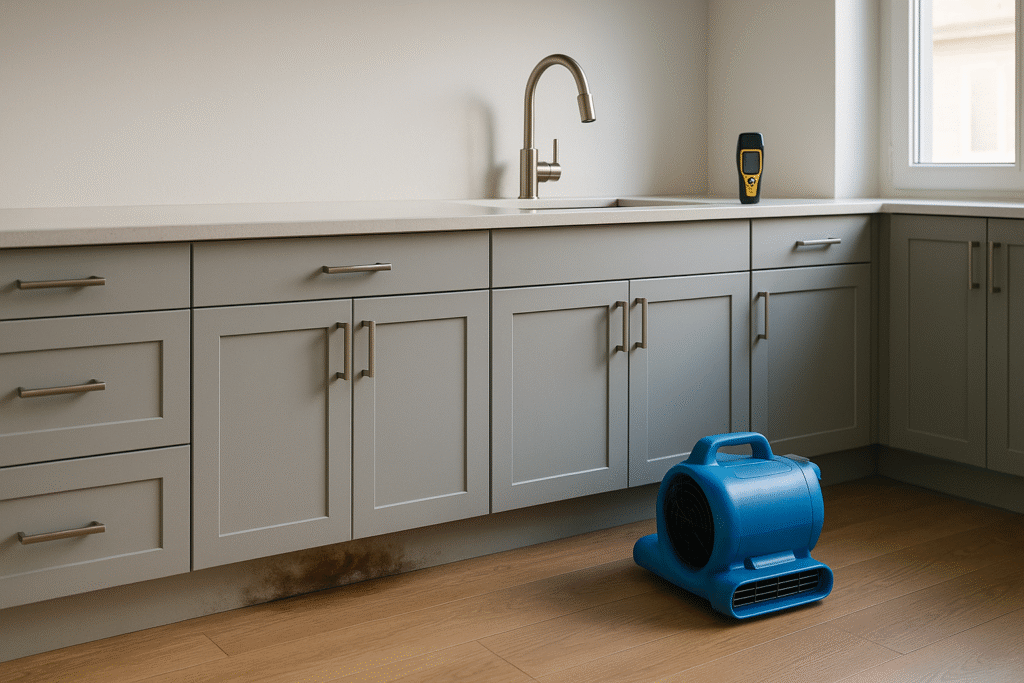
You notice a musty smell every time you open the cabinet under your kitchen sink. The wood feels a little soft. That is often how the mold remediation process really starts in a Twin Cities home, not with dramatic flooding but with a quiet leak that has already been dripping for days.
Once cabinets, walls, or flooring stay damp for more than a day or two, mold can begin to colonize the hidden spaces behind them. The surface might only show a faint stain, while the cavity behind the wall or under the cabinet is already darkened, soft, and contaminated. The longer you wait, the more material has to be removed and the more expensive the job becomes.
This guide walks through what actually happens during professional cleanup after a kitchen leak, how to tell if a contractor is following industry-aligned steps, and where you can safely handle small tasks yourself. The goal is simple. You understand what is happening in your home so you can move fast, avoid bad advice, and protect both your cabinets and your indoor air.
Why A Small Kitchen Leak Becomes A Mold Problem So Quickly
A kitchen sink or dishwasher line rarely fails all at once. More often a compression fitting slowly loosens, a supply line gasket starts to seep, or a drain trap drips only when the sink is full. The leak may be small enough that it evaporates at first. Once the cabinet base, drywall, or flooring tips past comfortably dry, moisture starts to accumulate faster than it can leave.
Cabinet boxes, particleboard toe-kicks, and laminate or engineered flooring are all made of materials that love to hold water. They pull moisture sideways and up, so an inch-wide drip under the trap can eventually stain boards several feet away. That damp wood is also a convenient food source for mold spores already floating in the air. Given time and the right temperature, they settle in and start to grow.
Public health agencies point out that the longer dampness and mold are allowed to sit, the more damage they cause and the harder they are to remove. Guidance like the California Department of Public Health’s “Mold or Moisture in My Home” emphasizes the need to quickly find damp areas, fix leaks, dry wet materials, and remove contaminated items instead of ignoring them or covering them with paint or caulk CDPH mold and moisture guide. That same logic applies when the problem starts under a quiet kitchen sink.
In real terms that means the clock is running. If you catch a drip within hours and dry everything thoroughly, you might avoid structural damage and visible mold. If days pass while the cabinet stays damp, expect mold growth on the back of drywall, the underside of subfloor, or inside the toe-kick even if the visible face of the cabinet still looks fine.
Step By Step Mold Remediation Process In A Wet Kitchen
Understanding what a proper mold remediation process looks like in a kitchen gives you a clear measuring stick. A good contractor will move through assessment, containment, removal, drying, and verification in a predictable sequence. Each step protects your family’s air and protects the rest of the house from cross contamination.
Assessment, Moisture Mapping, And Safety Prep
The visit should start with questions, not tools. A careful technician asks when you first noticed the problem, what work has been done nearby, and whether anyone in the home has asthma, allergies, or immune concerns. That history helps them decide how aggressively to test and how large an area to inspect around the leak.
Next comes moisture mapping. The contractor will typically use a combination of a non invasive moisture meter on cabinet faces and drywall, a pin meter on baseboards and framing, and sometimes an infrared camera to look for cool, damp areas around the sink and dishwasher. They should not just wave the meter once and call it good. Expect them to check along the base of adjacent cabinets, flooring seams, and the wall behind any nearby appliances.
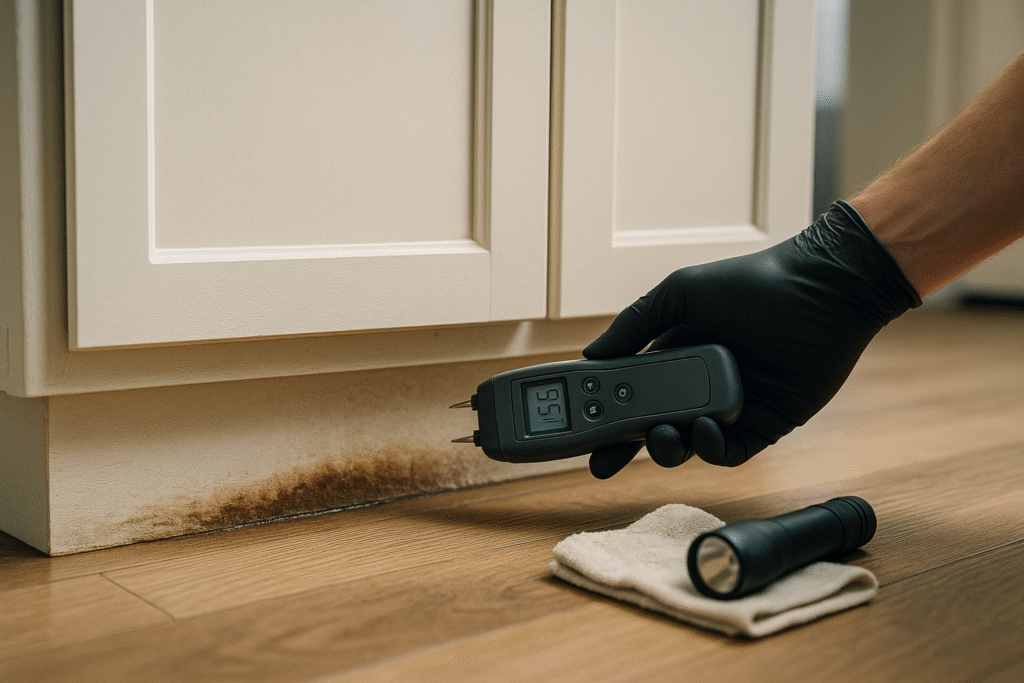
During this stage, a reputable company will also think about safety. That includes checking for electrical risks if outlets or dishwasher wiring might have been wet, looking for signs of sewage or contaminated water, and deciding whether anyone should enter the space without respirators once materials are opened. In some homes near older commercial areas, like around the West End, they may also consider whether painted surfaces could contain lead and choose dust-minimizing methods accordingly.
Containment, Air Control, And Careful Demolition
Once the wet area is mapped, the next step is to keep mold spores from spreading to the rest of the house. In a kitchen that typically means building floor to ceiling plastic containment around the affected cabinets and wall, taping it tightly to the ceiling, walls, and floor, and adding a zipper door so workers can enter without leaving gaps.
A HEPA-filtered negative air machine is then vented to the exterior through a window or door. This creates a slight vacuum so any disturbed spores flow into the machine instead of drifting into the hallway or family room. Contractors who skip this step and just start tearing out wet materials with a shop vacuum are inviting cross contamination.
Only after containment is secure should demolition begin. In a typical kitchen leak that may involve removing toe-kicks, taking out the sink cabinet and any neighboring cabinet boxes that have swelled or show visible growth, cutting out moldy drywall behind the cabinets, and lifting damaged flooring. A careful crew will cut straight, clean lines, bag debris inside the containment area, and avoid smashing or breaking materials more than necessary. Current guidance from the Centers for Disease Control and Prevention stresses that mold remediation requires physical removal of mold contaminated materials instead of simply spraying disinfectant and walking away CDC mold clean up guidelines. Good contractors follow that same principle inside your kitchen.

Drying, Cleaning, And Verifying The Space
Once the wet and moldy materials are gone, the job shifts from demolition to drying and cleaning. The contractor will usually place a dehumidifier and strategically positioned air movers to dry the remaining framing, subfloor, and adjacent finishes. In many kitchen layouts, the drying equipment can sit outside the containment while air flows across the open cavities inside. That reduces noise and helps keep the rest of the home more comfortable.
All exposed wood, concrete, and other hard surfaces inside containment should be thoroughly HEPA vacuumed to remove dust and settled spores. Then the crew will typically scrub or wipe these surfaces with a detergent solution, sometimes followed by a disinfectant compatible with local regulations and manufacturer directions. The goal is a clean, dry surface, not a glossy, chemical coated surface.
Verification is the last step. That can include documenting dry standard moisture readings on framing and sheathing, checking that there is no visible dust or debris left inside the work area, and confirming that odors have diminished. Some homeowners also choose to hire an independent indoor air quality professional to take clearance samples, especially if someone in the home is medically vulnerable. Only when everything is dry and clean should build back and cabinet replacement begin.
Red Flags That A Mold Contractor Is Cutting Corners
Once you understand the basic sequence, it becomes much easier to spot when someone is skipping steps. A rushed or careless contractor can turn a contained kitchen problem into a house wide headache. The signs of trouble usually show up both in the way they handle the work and in the paperwork they give you.
Process Red Flags In Your Kitchen
One of the biggest red flags is a promise to fix everything with a single spray or fog. If a company says they can handle mold behind cabinets without removing any materials, building containment, or drying the structure, they are ignoring how mold grows and how moisture moves. Sprays may change surface appearance for a while but they do not remove soaked particleboard or mold inside wall cavities.
Another warning sign is a lack of basic protection. If workers show up in street clothes with paper dust masks, no gloves, and no attempt to protect the rest of the home, that is a concern. Likewise, starting demolition before any negative air machine or sealed plastic is in place suggests they are more interested in speed than in controlling spores. In a kitchen that opens into a living or dining space, that kind of approach can spread dust into carpeting, couches, and children’s play areas.
Finally, watch how they use tools. A reputable contractor takes moisture readings and writes them down. A poor one may wave a meter for show without explaining what the numbers mean or where the readings are high. Around places like older townhomes near Bde Maka Ska where multiple units share walls, that level of sloppiness can affect neighbors as well as your own family.
Paperwork And Pricing Red Flags
On the paperwork side, vague scopes are a problem. If your estimate simply says “mold treatment in kitchen” with no mention of how many linear feet of wall will be opened, which cabinets might need removal, or how many days of drying are planned, it is hard to compare bids or hold anyone accountable. A better estimate breaks the job into inspection, containment, demolition, drying, cleaning, and rebuild so you can see where the costs sit.
Watch for pricing structures that make you nervous. Large, upfront deposits before any work, vague “emergency fees” that are not tied to specific tasks, or aggressive pressure to sign an assignment of benefits without explanation are common red flags. A solid contractor can explain how they bill, how they interact with your insurance adjuster, and what happens if hidden damage appears after cabinets come out.
Documentation matters too. Ask whether the company will provide photos of the damage before, during, and after demolition, as well as moisture logs and equipment records. If they seem offended by these questions or refuse to put answers in writing, that is a sign to keep looking. In a kitchen job where materials are expensive and access is tight, clarity protects both sides.
When To Call A Pro In St Louis Park
There are times when a determined homeowner can handle small cleanup and drying on their own. There are also clear situations where calling a local professional is the safest and most cost effective choice. In and around St Louis Park, many homes have kitchens that back up to exterior walls or sit over finished lower levels. That means water from a leak has more places to hide and more ways to damage your home.
If you see visible mold larger than a small patch on a hard surface, smell a strong musty odor each time you open base cabinets, or discover that flooring is soft or buckled in front of the sink, it is wise to at least get an inspection. This is especially true if anyone in the home has asthma, severe allergies, or other breathing issues, or if the home includes older residents or very young children. Mold and moisture can aggravate these conditions even when growth is mostly hidden.
Calling a company like Optimized Restoration for an evaluation does not lock you into a full project. What it does give you is a clear picture of how far the problem extends, what it will take to open up and dry hidden areas, and whether the issue is likely to be covered by insurance. A local contractor who understands common construction styles in neighborhoods off Highway 7 or near Louisiana Avenue can also warn you about issues like shared plumbing chases or tricky access behind corner cabinets.
If water is still actively leaking, power outlets near the sink are wet, or you suspect the water source might include sewage, skip DIY and call a professional immediately. In those cases the risk to health and building materials is too high to experiment.
DIY Vs Professional Mold Removal In A Kitchen
It is natural to want to save money by doing as much as possible yourself. The key is knowing where the line is between reasonable homeowner work and tasks that require specialized equipment and training. Kitchen mold sits in a risky middle ground because it often involves enclosed cavities, plumbing, and expensive finishes.
Many homeowners can safely handle very small areas of surface mold on hard, non porous materials if they are healthy and use basic protective gear like gloves and a good respirator. That might include cleaning a bit of mold on caulk near a backsplash or a small patch on the inside of a cabinet door where a spill dried slowly. Even then, you should still track down and fix the moisture source or the growth will return.
Once mold involves the back of drywall, cabinet boxes, subfloor, insulation, or a large section of flooring, it becomes a better candidate for professional remediation. Opening walls inside a kitchen without containment can spread spores into every nearby room. Handling demolition without understanding load paths or electrical routing can also create structural or safety issues. A pro has access to HEPA filtration, commercial dehumidifiers, and the experience to remove only what is necessary while protecting the rest of your finishes.

A hybrid approach can work well. You might shut off the water, move belongings out of the affected area, lift loose rugs, and start basic cleanup while you wait for a contractor to arrive. The professional crew then handles anything that involves cutting into structures, managing air quality, or documenting conditions for insurance.
Keeping A Recently Remediated Kitchen Healthy Long Term
Once the dust has settled and new cabinets or flooring are in place, the last thing you want is a repeat performance a year later. Long term indoor air quality in a kitchen depends on two big factors. The first is preventing new leaks. The second is keeping humidity and everyday moisture under control so small spills do not turn into chronic damp spots.
Start with the plumbing. Periodically run your hand along shutoff valves and supply lines under the sink to feel for condensation or small drips. Replace old braided hoses and plastic angle stops before they fail. Consider adding simple leak sensors under the sink and behind the dishwasher that can alert you to water where it does not belong. In homes with finished lower levels, this kind of early warning can prevent water from sneaking through the floor into the ceiling below.
Next, look at daily moisture habits. Avoid storing clutter tightly packed against the back of sink cabinets where air cannot circulate. Wipe up splashes on the counter and floor rather than letting them air dry under rugs or mats. If you run a whole house humidifier during winter, keep indoor humidity in a moderate range rather than turning your kitchen into a greenhouse.
Federal agencies repeatedly stress that the key to mold control is moisture control. The Environmental Protection Agency’s mold resources highlight that cleaning up existing growth is only half the job. Fixing water problems and keeping surfaces dry is what prevents mold from returning behind walls or under cabinets EPA guidance on mold and your home. With that mindset, a remediated kitchen can stay healthy for years.
Quick Action Checklist For A Suspected Kitchen Leak
When you first notice a possible kitchen leak, having a simple plan helps you act quickly without panicking. These steps focus on safety, stopping the water, and gathering useful information for any contractor or insurance adjuster you later involve.
1. Stay safe. If there is standing water near outlets or appliances, avoid stepping into it and shut off power at the breaker if you can do so safely.
2. Stop the water. Close the sink shutoff valves or main water valve, and do not use the dishwasher or sink until you know where the leak is coming from.
3. Protect belongings. Move rugs, trash cans, and stored items out of the damp area so they can dry and so you can see the full extent of the damage.
4. Blot and contain. Use towels to blot up accessible water on hard flooring and place a shallow pan or tray under any active drip inside the cabinet.
5. Document conditions. Take clear photos of wet areas, cabinet damage, and any staining before you start major cleanup or demolition.
6. Check adjoining areas. Look at the back side of the wall in nearby rooms or below the kitchen if there is a finished ceiling to spot any early staining or sagging.
7. Decide on help. If materials are clearly wet, soft, or moldy, or if the area feels larger than a small spill, contact a reputable local restoration contractor for an assessment.
FAQ: Mold Remediation After A Kitchen Leak
How fast can mold grow after a kitchen leak? Mold spores are always present in indoor air. When cabinets, drywall, or subflooring stay damp, growth can begin in as little as a day or two. The first signs are often a musty odor or slight discoloration. Because the worst growth usually happens on the back side of materials, you may not see anything until the problem is several days or weeks old.
How long does kitchen mold remediation usually take? The timeline depends on how long the leak has been active and how far moisture has spread. A small, contained area with limited demolition may only take a few days of work and drying. Larger jobs that involve multiple cabinets, wall sections, and flooring can stretch into a week or more, especially if drying is slow or if build back must wait for special order materials.
Do you always have to remove cabinets and flooring? Not always, but more often than homeowners expect. If moisture has only affected a small area and readings show nearby materials are dry, some cabinets and flooring may be salvageable. When wood has swelled, finishes are delaminating, or mold is visible on the back side of materials, removal is usually the safest option. A thorough inspection and moisture mapping help avoid both unnecessary demolition and risky shortcuts.
Handled thoughtfully, a kitchen leak does not have to turn into a long term indoor air quality problem. By learning what a proper remediation process looks like, spotting red flags early, and choosing a contractor who treats your home as carefully as their own, you stay in control of the timeline, the cost, and the health of the space where your family cooks and gathers.
Recommended articles

Mold Liability After Water Damage In Orono: Who Pays When A Finished Basement Grows Mold
A slow seep in a finished basement can turn into a moldy mess and an argument over who pays. This guide walks you through mold liability after water damage, how to sort out responsibility between owners, tenants, HOAs, and contractors, and what to document so you stay in control instead of stuck in a feud.
Kitchen Leak Mold Traps That Make Minnetonka Beach Families Overpay
A slow kitchen leak can quietly grow mold, trigger real mold health risks, and open the door for exaggerated bids and confusing insurance advice. This guide shows you how to protect your family’s lungs and your wallet with a clear kitchen mold action plan and scam-proof checklist.
From Panic To Peace: A Bathroom Mold Cleanup Story In Victoria
A simple upstairs bathroom overflow turned into hidden mold, scary health questions, and a bloated five-figure estimate. This case study walks through what really happened, how the bathroom mold remediation process should look, and the money-saving choices that kept one Victoria family from overpaying.