
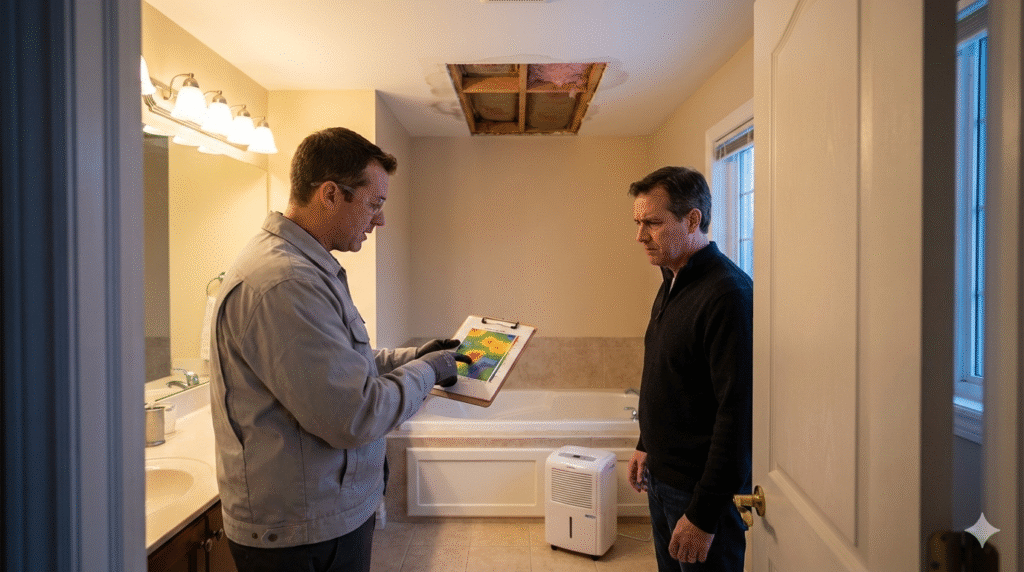
A bathroom leak is stressful enough. Add the words “mold behind the walls” and “tearing out the whole bathroom,” and it is easy to feel trapped between fear and a five-figure bill. This case study follows one upstairs leak, one family’s bathroom mold remediation journey, and how understanding the process helped them avoid overpaying.
Imagine coming home on a Sunday night to a faint stain on the living room ceiling, a musty smell in the hallway, and the nagging question: “Is my family breathing mold?” The first contractor waves a thick estimate and warns that “everything has to go.” The second takes more measurements than photos and explains what actually needs to be opened, cleaned, and dried. Same bathroom. Very different price tags.
From Overflow To Hidden Mold: A Bathroom Story
The family in this story lives on a quiet street not far from Lake Minnetonka. A toilet fill valve stuck open in the upstairs hall bathroom while they were out for the day. Water ran across the tile, under the baseboard, and down through a plumbing chase into the living room ceiling below. By the time they noticed, there was standing water on the bathroom floor and a slow drip from a ceiling light downstairs.
They did many things right. They shut off the water, called a plumber, pulled out some baseboard, and set up a couple of fans. The ceiling dried on the surface, the stain lightened, and life moved on. What never fully dried was the insulation tucked inside the joist bay or the damp strip of drywall behind the tub and vanity. Those materials stayed cool and slightly damp. Within a few weeks, the musty odor in the hallway returned every time the door stayed closed.
Months later, when the stain darkened and the smell became obvious, they called their insurance carrier. An adjuster recommended a restoration company that produced a very large estimate with full-gut demolition of the bathroom, removal of all flooring in the hallway and adjacent bedroom, and extensive duct cleaning. It looked “professional,” but it did not match the pattern of damage. The family decided to get another opinion before signing.
How A Simple Leak Became A Mold Problem
A single overflow or running toilet feels like a one-time disaster, yet mold behaves more like a slow-moving consequence. Where water goes, mold can follow if surfaces stay damp for long enough. In an upstairs bathroom, that means paying attention to three things: how much water escaped, where it could travel inside the structure, and how quickly those hidden spaces can dry.
Warning Signs You Can See And Smell
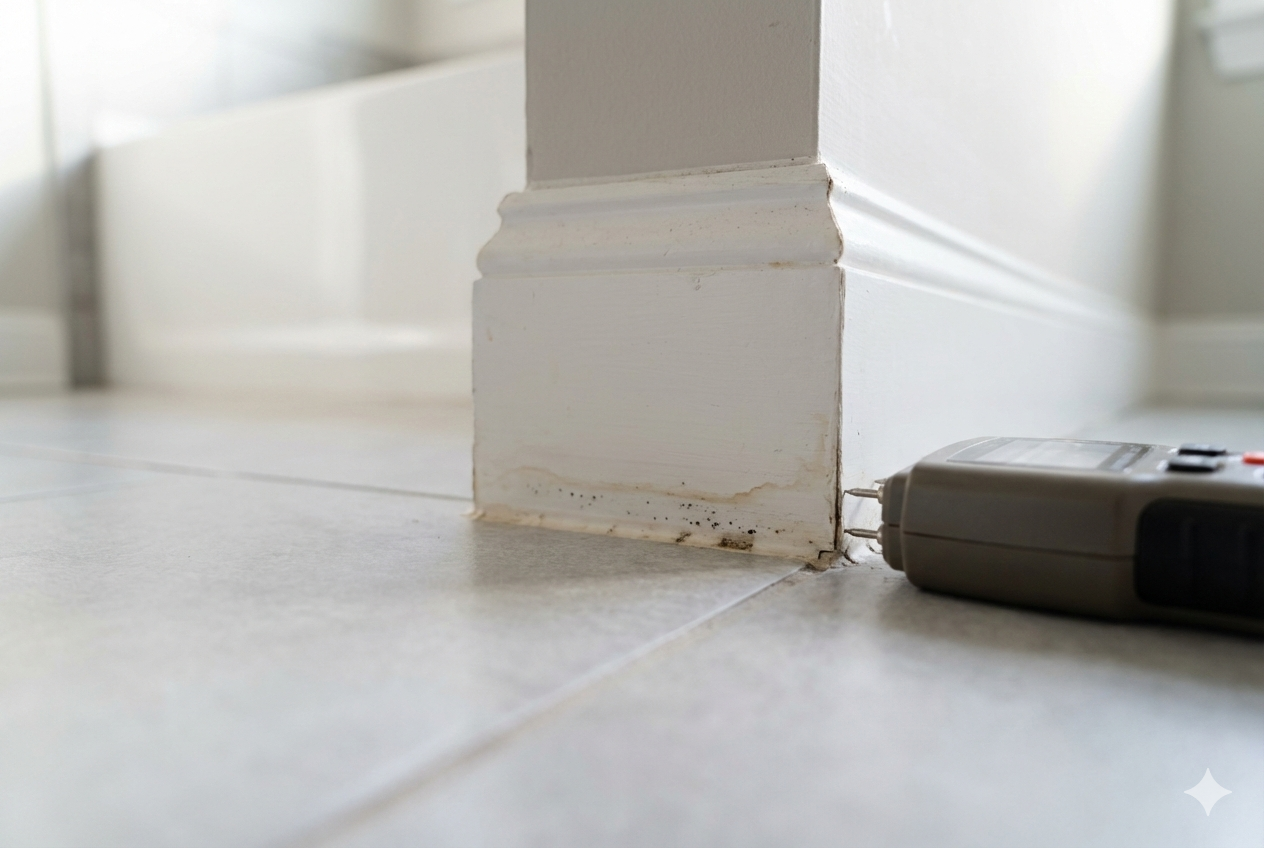
In this case, the earliest sign was a faint tan ring on the living room ceiling. That mark alone did not prove mold. It simply showed that water had once moved through the drywall. Over time, the family noticed a sweet, earthy odor near the bathroom door, slight bubbling in the paint over the tub, and a short section of baseboard that felt spongy when pressed.
These are classic small-room warning signs: stains that reappear after painting, caulk that discolors faster than the rest, or trim that separates slightly from the wall. In a bathroom, it is easy to blame everyday shower moisture. When symptoms stay concentrated around one corner, below one fixture, or on the ceiling below the room, they often point to a specific past leak that never fully dried, not just high humidity from showers.
Hidden Damage Inside Walls And Ceilings
Water rarely stops at the painted surface you can see. It follows gravity and framing. In an upstairs bathroom, it can pool on the drywall behind the tub, soak fiberglass insulation inside exterior walls, or trickle along joists until it finds a low spot in the ceiling below. Those shaded, air-restricted cavities are perfect for mold if they stay damp for more than a couple of days.
Health organizations note that damp, moldy indoor spaces can aggravate asthma, allergies, and other respiratory symptoms, even when growth is mostly hidden behind finishes. The American Lung Association explains that both mold and dampness alone are linked with coughing, wheezing, and worsening asthma in sensitive people, particularly in chronically damp homes such as bathrooms and basements (American Lung Association overview of mold and health). That is why understanding what is happening inside the structure matters as much as what you see on the surface.
Bathroom Mold Remediation Step By Step After An Upstairs Leak
The second contractor the family called took a very different approach. Instead of starting with a demolition list, they started with measurements and a walkthrough of how the bathroom was built. Here is how a right-sized bathroom mold remediation project should unfold after an upstairs leak like this.
Step 1: Inspection And Moisture Mapping
First, a technician documents the story in plain language. When did the leak happen, how long did water run, what emergency steps were taken, and what has changed since then? Then they use moisture meters and sometimes thermal imaging to scan walls, ceilings, and floors around the bathroom and the room below.
In this case, the inspector found elevated moisture behind the tub wall, around the toilet supply, and in a narrow band of the living room ceiling. The hallway and bedroom floors were dry. That data mattered. It showed that the damage was focused, not whole-house. It also helped define the minimum amount of drywall that truly needed to be opened to remove mold and dry the structure instead of guessing or tearing out extra “just in case.”
Step 2: Build Safe Containment Around The Work Area
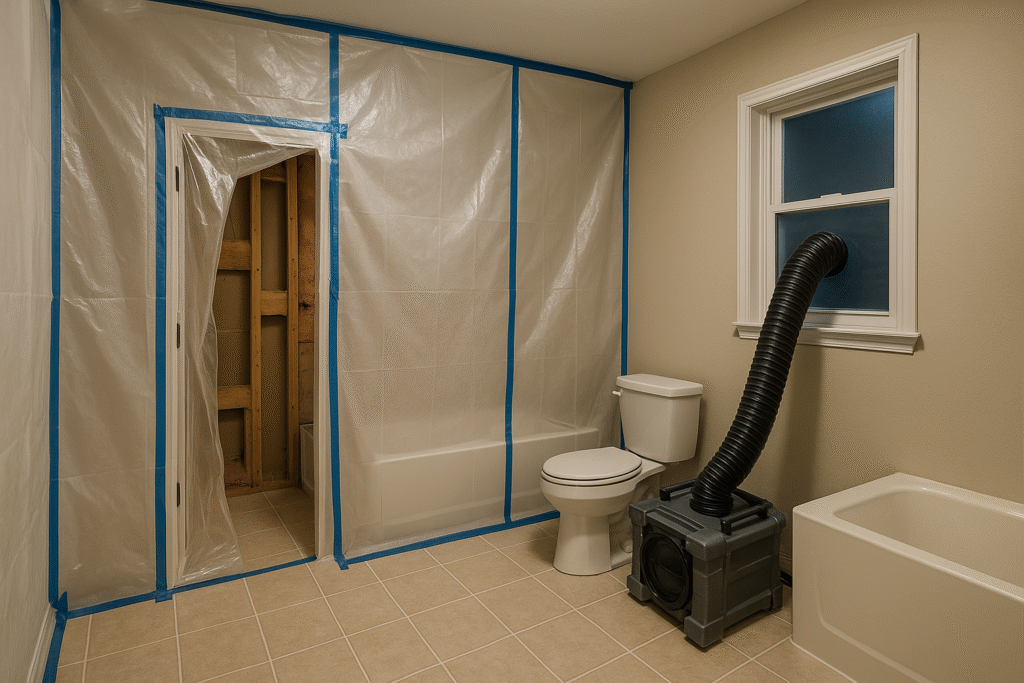
Once the wet and suspect areas are mapped, a proper mold job turns the bathroom into a controlled work zone. Floor-to-ceiling plastic is taped to the ceiling and floor at the doorway and sometimes around the tub alcove. A zipper door allows workers in and out without leaving big gaps. A HEPA-filtered negative air machine pulls air from inside the containment and exhausts it outside through a window.
This setup does two things. It helps keep dust and spores from spreading when drywall is opened, and it protects the rest of the house from cross-contamination. The goal is to keep the work surgical: one room under pressure, not an entire floor covered in plastic. A company like Optimized Restoration would also protect nearby flooring, stairs, and furnishings with clean pathway coverings so you are not paying to clean up unnecessary mess later.
Step 3: Careful Removal Of Moldy Building Materials
With containment in place, demolition can stay targeted. Instead of gutting the entire bathroom, the crew removes only the materials that are either visibly moldy or still reading wet. In this story, that meant opening a strip of ceiling below the leak, a band of drywall behind the toilet and tub, a short run of baseboard, and a small portion of insulation.
Porous items like drywall, paper-faced insulation, and swollen particleboard often have to be discarded because mold can grow inside them. Solid wood framing can usually be cleaned and saved if it is structurally sound. Good crews cut drywall along straight lines, bag debris inside the containment, and HEPA-vacuum surfaces as they go. That attention to detail keeps the scope realistic and makes rebuilding simpler and cheaper.
Step 4: Drying, Cleaning, And Verification
After removal, the remaining framing and surfaces are cleaned with HEPA vacuuming and damp wiping. In some cases, an antimicrobial product is applied as a supplemental step, but it should never replace physically removing growth and drying the structure. Air movers and dehumidifiers run until moisture readings in the wood and surrounding materials are back in a normal range.
County and state guidance on mold cleanup focus heavily on fixing the moisture source and drying materials within a couple of days to prevent regrowth, rather than relying on chemicals alone. Resources like Benton County’s flood cleanup handout emphasize investigating where water came from, removing soaked porous materials, and using protective gear while cleaning (Benton County “Dealing with Mold Problems after a Flood” guide). A good contractor will document final moisture readings and provide photos of cleaned, dry framing so you have proof that the space is ready to rebuild.
How Right-Sized Cleanup Saves You Thousands
When the family compared the two estimates, they were stunned. The first proposal called for removing every tile in the bathroom, all cabinetry, all flooring on the level below, and cleaning the entire HVAC system. The second focused on the portion of the bathroom and ceiling that actually showed damage in the inspection. The cost difference ran into many thousands of dollars.
Where Bathroom Mold Jobs Get Overscoped
Overscoping often hides in the details. You might see full-room demolition when moisture is limited to one wall, “just in case” duct cleaning even though supply and return trunks are far from the leak, or charges for multiple phases of air filtration that are not tied to specific work stages. Some estimates use square footage numbers that exceed the actual room size, or line items like “content manipulation” for simple tasks such as moving a few towels.
None of this means large jobs are never justified. Some bathroom leaks really do saturate an entire floor. The problem comes when scope is driven more by habit or profit than by measurements. Asking the contractor to match each demolition line item to a moisture reading, photo, or visible damage location is a simple way to trim out the fluff. You are not trying to undercut needed work. You are aligning the work to what your home actually needs.
Smart Questions That Keep Your Invoice Honest
You do not have to be a building scientist to keep a mold estimate grounded. Start by asking, “Which parts of the bathroom can be cleaned and saved, and why?” Make them explain whether tile, vanities, and framing are being removed because they are damaged, contaminated, or just in the way. Ask for before-and-after moisture readings in any area they plan to open.
Clarify unit quantities: “How many linear feet of baseboard is this?” “How many square feet of ceiling?” “How many days of equipment rental does this represent?” When a contractor knows you are paying attention to scope, the conversation shifts. If you need to work with your insurance carrier, having a clear, measured estimate makes it easier to push back on unnecessary tear-out while still getting the essential work covered.
When To Call A Pro In Victoria
Not every bathroom leak with a small stain requires a full professional crew. Many small, clean-water incidents on easily cleaned surfaces are reasonable DIY projects. The line shifts when the damage is larger, hidden, or tied to health concerns. If you see mold on more than a few square feet of drywall, smell strong musty odors that return after wiping surfaces, or know that water ran into ceilings or walls for more than a day, it is worth calling in a qualified mold and water-damage contractor.
Local public health resources encourage homeowners to investigate moisture problems quickly and to remove wet materials instead of relying on testing alone. Dakota County’s guidance, for example, notes that people are often better off tracking down the source of moisture, cleaning or removing affected materials, and then deciding whether to seek professional help for larger or persistent problems (Dakota County “Look for Mold” information). If anyone in your home has asthma, compromised immunity, or severe allergies, you should also talk with a medical professional about symptoms that might be triggered by damp, moldy spaces.
When you do call a contractor in the west-metro area, ask about their experience with bathroom leaks, how they document moisture, and how they separate necessary work from “nice-to-have” extras. A local, detail-oriented company like Optimized Restoration can walk you through the scope before any demolition starts so you understand both the health benefits and the financial impact.
Action Checklist: First 24 Hours After A Bathroom Leak
Even before anyone mentions mold, the first day after a leak sets the stage for either a quick recovery or a long, expensive cleanup. Use this simple checklist to stabilize the situation safely and give yourself options.
- Shut off the water supply feeding the toilet, tub, or sink, and confirm the fixture has stopped running.
- Turn off electricity to any ceiling fixtures or outlets that got wet, if it is safe to do so, and avoid walking under sagging drywall.
- Blot and remove standing water on hard surfaces with towels and a wet/dry vacuum; move rugs and loose items out of the way to dry.
- Open doors and run exhaust fans in nearby rooms to improve airflow, but avoid blowing air directly into visibly moldy areas.
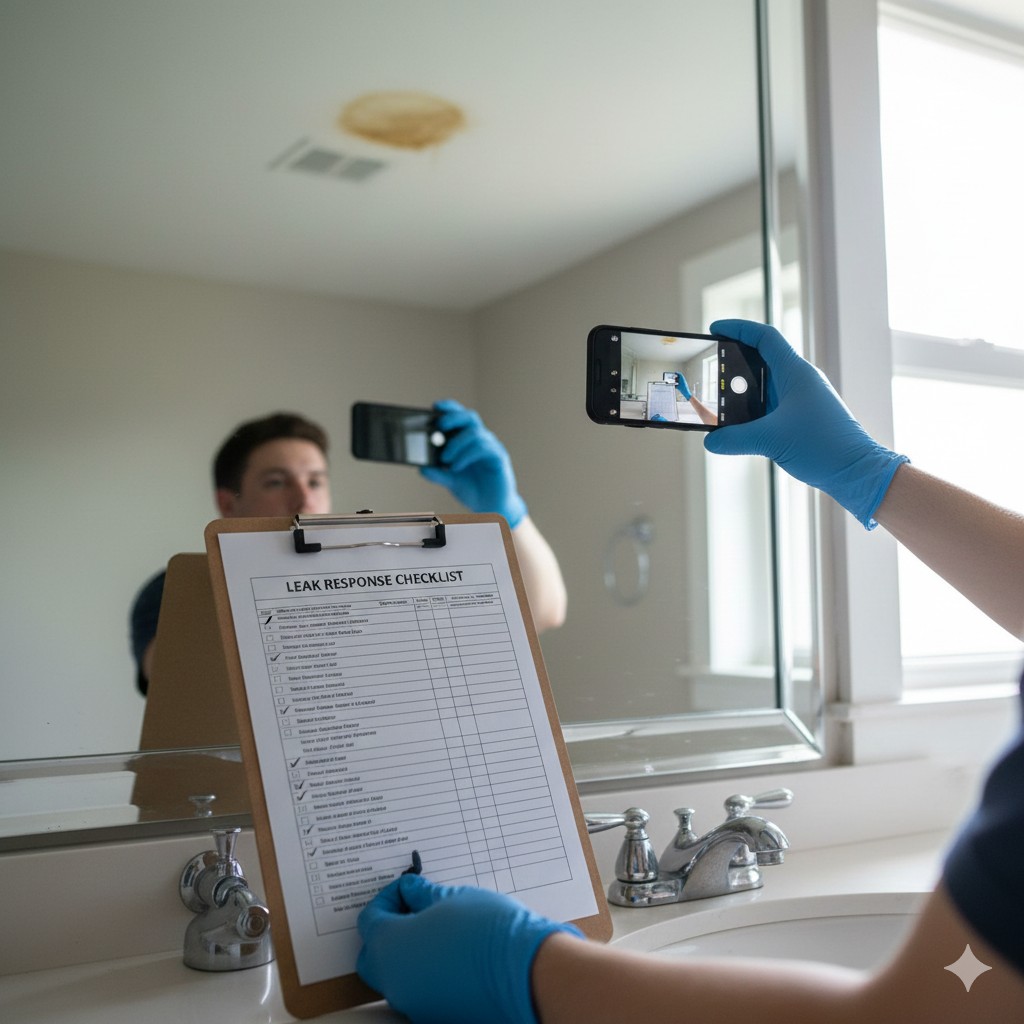
- Document the damage with clear photos and short videos from multiple angles, including any dripping, staining, or warped finishes.
- Use a basic moisture meter if you have one to check trim and ceilings around the leak, and jot down any high readings for later.
- Contact your insurance carrier and, if the damage seems significant or involves hidden spaces, schedule at least one inspection with a reputable restoration contractor.
FAQ: Bathroom Mold, Costs, And Cleanup
How Long Does Bathroom Mold Remediation Usually Take?
For a focused project like this, the active work often spans three to seven days. That includes setup, demolition, cleaning, and structural drying. Rebuilding finishes such as drywall, paint, and tile can add another week or two depending on schedules and material availability. Larger or more complex jobs take longer.
Can You Stay In Your Home During Bathroom Mold Work?
Most families can stay in the home while a single bathroom is under containment, as long as there is another working bathroom and the contractor uses proper isolation and ventilation. You may want to spend extra time away during demolition days due to noise and traffic. If someone in your household is medically fragile, ask your doctor for guidance.
Does Homeowners Insurance Pay For Bathroom Mold Cleanup?
Policies often cover sudden, accidental water damage from events like an overflow or broken supply line, but they may limit or exclude coverage for mold itself. That means drying, demolition, and cleaning in the directly affected area could be covered while long-term humidity or maintenance issues are not. Reviewing your policy and talking with your adjuster before work begins can prevent surprises.
Recommended articles

Mold Liability After Water Damage In Orono: Who Pays When A Finished Basement Grows Mold
A slow seep in a finished basement can turn into a moldy mess and an argument over who pays. This guide walks you through mold liability after water damage, how to sort out responsibility between owners, tenants, HOAs, and contractors, and what to document so you stay in control instead of stuck in a feud.
Kitchen Leak Mold Traps That Make Minnetonka Beach Families Overpay
A slow kitchen leak can quietly grow mold, trigger real mold health risks, and open the door for exaggerated bids and confusing insurance advice. This guide shows you how to protect your family’s lungs and your wallet with a clear kitchen mold action plan and scam-proof checklist.
Laundry Room Mold Survival Guide for Minnetonka Beach Homeowners
A washing machine leak in a small laundry room can quietly turn into stained trim, musty smells, and insurance headaches. This guide walks you through laundry room mold prevention, from hose inspections and humidity control to a practical “survival kit” and checklist that keep you in control when something goes wrong.