
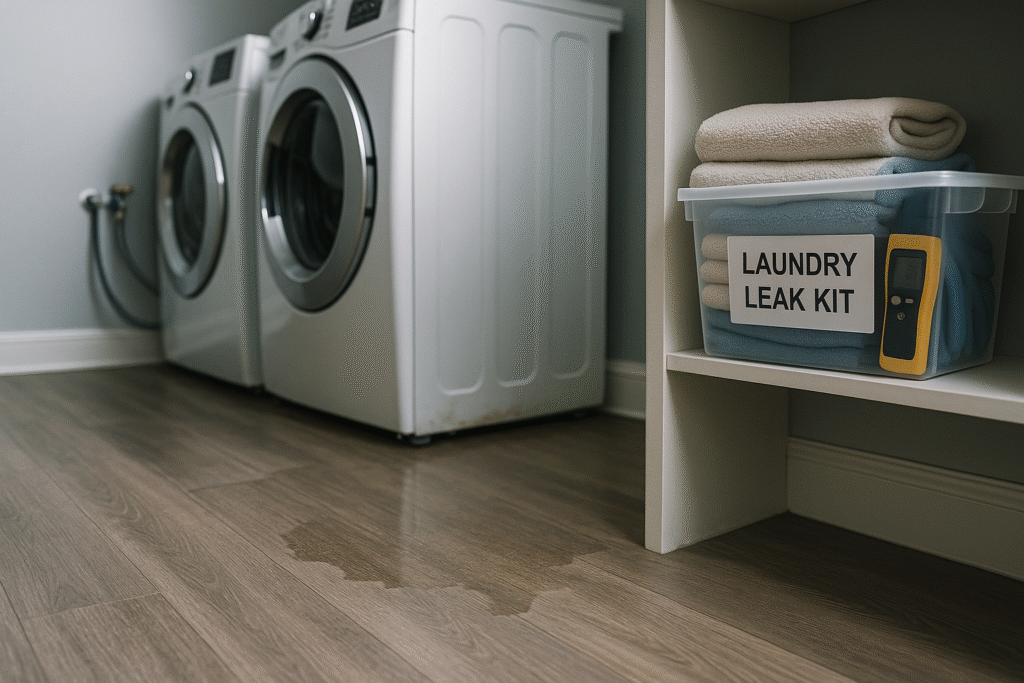
Laundry room mold prevention starts long before you see fuzzy spots on a wall. It begins with how you maintain your washer hoses, manage humidity, and react in the first few minutes after a leak. When you understand that system, you can turn one of the riskiest rooms in your home into a controllable, low-stress space.
For homeowners around Lake Minnetonka, a small washer drip can quickly turn into swollen trim, ruined flooring, and arguments about who pays for what. A simple “laundry leak survival kit,” a clear checklist, and a working knowledge of how mold behaves give you leverage. You can limit damage, document what happened, and avoid being pushed into unnecessary demolition or bloated invoices.
This guide walks you through the science behind moisture and mold, the exact habits that keep laundry leaks from spiraling, and how to protect your rights if a cleanup company or insurer gets involved.
Why laundry leaks are a hidden mold risk
Washer leaks rarely start as dramatic gushes of water. More often a supply hose seeps at the crimp, a drain hose drips slowly into a wall cavity, or a tiny overflow runs under vinyl where you do not see it. Because laundry rooms are usually small and packed with appliances, you may only notice a faint musty smell or slightly curled flooring long after mold has started growing.
The plumbing that feeds a washing machine runs at full household pressure. A cracked rubber hose or failed connector can release hundreds of gallons if the line is left open. Even a few gallons can soak baseboards, insulation, and the framing behind your laundry wall. That hidden moisture is what mold depends on. Unlike a kitchen floor puddle that you can mop up easily, water that seeps under flooring or behind drywall stays trapped next to paper, wood, and dust.
Laundry rooms also create humidity from normal use. Warm rinse cycles, steam from nearby bathrooms, and sometimes poor ventilation combine to keep this corner of the house more humid than other rooms. If your dryer is not venting well or your vent hood outside is clogged, that moisture lingers. Over time, elevated humidity and repeated small splashes at the washer edge can keep materials close to the “always damp” zone that mold loves.
Leaks in second floor or over-garage laundry rooms add another layer of risk. Water can travel along joists and show up as stains in ceilings or walls one or two rooms away. By the time you see damage, the source may be dry and the mold may be concentrated behind the laundry wall where you cannot see it without opening materials. Understanding how water travels helps you decide when careful monitoring is enough and when you need inspection openings or professional help.
Laundry room mold prevention essentials: how moisture really works
Every laundry room mold problem comes down to three ingredients: spores, food, and moisture. Spores float through the air everywhere, including the cleanest homes. The paper on drywall, dust on framing, and even lint behind your washer act as food. The only ingredient you can reliably control is moisture, which is why laundry room mold prevention is really a moisture control strategy.
Moisture shows up in two forms around your washer. The first is liquid water from leaks, splashover, or drain issues. The second is humidity, which is moisture in the air that can condense on cooler surfaces. When a small leak wets drywall or subfloor, the material can stay above its safe moisture range for days unless you dry it aggressively. When humidity stays high, the surface of cooler walls and trim can accumulate just enough condensation to stay slightly damp even without a visible leak.
Research-based guidance recommends keeping indoor relative humidity below about 60 percent, with a sweet spot between 30 and 50 percent. A simple digital hygrometer on a laundry shelf tells you whether your prevention habits are working. University extension specialists summarize these humidity targets and explain how to maintain them using ventilation, dehumidification, and prompt repair of leaks in the rest of the home too, not just the laundry corner. University of Georgia extension tips on preventing mold in your home describe these moisture ranges and why they matter. :contentReference[oaicite:0]{index=0}
How laundry moisture turns into mold growth
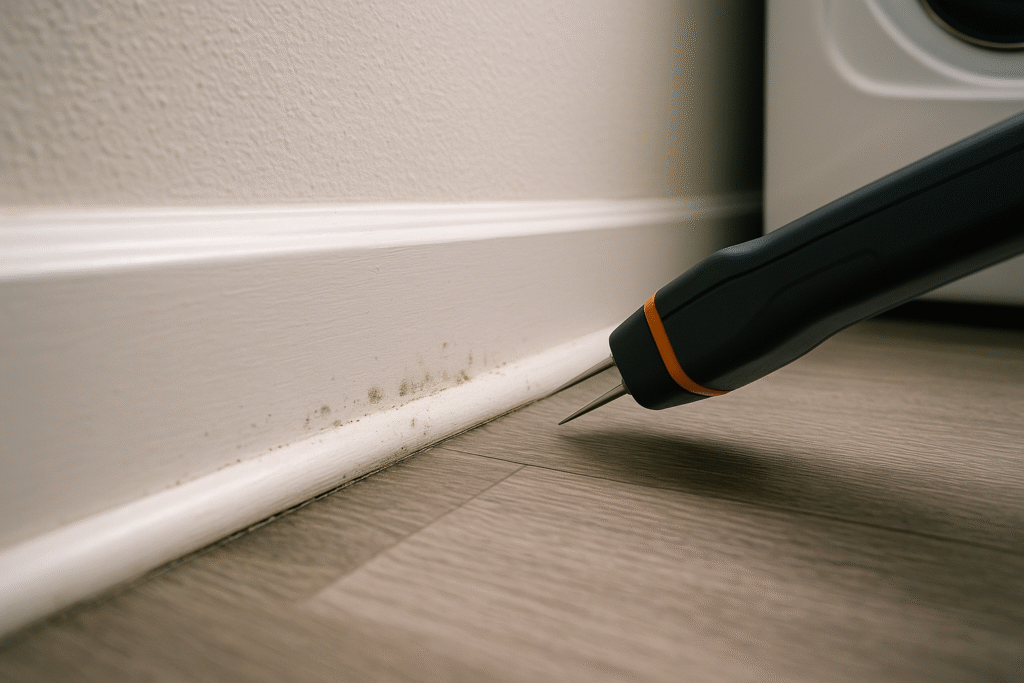
When a washing machine leaks, even a little, porous materials act like sponges. The bottom of the drywall pulls water upward through capillary action, the paper facing softens, and the hidden side near the insulation often stays wet longer than the painted side you can see. If that moisture sits for more than a day or two, spores that were already present can take hold and start colonizing the paper and dust.
High humidity from repeated hot loads has a slower but similar effect. Warm moist air drifts behind and under the washer where it is cooler and less ventilated. That air can reach its dew point and deposit a thin film of water on baseboards, flooring edges, and utility penetrations. It may never form visible droplets. Instead, those small areas stay just a bit damp for long periods, which is enough to support slow mold growth and the musty smell many homeowners notice first.
Key conditions to watch in your laundry area
To stay ahead of mold, focus on three measurements: humidity, temperature, and material moisture. A plug-in hygrometer gives you the first number. Your thermostat and common sense give you the second. For the third, an inexpensive pin-type moisture meter can help you check baseboards or trim after a spill or suspected leak. You do not need contractor-grade instruments, only tools that tell you whether materials are still elevated after a dry-out effort.
You also want to track how long materials stay damp. Mold growth is much less likely if you can dry wet items within roughly one to two days. That means using fans and dehumidifiers quickly after a leak, and not assuming that a surface that “feels dry” is safe if it was saturated earlier. A rough log where you note the time of the leak, when you shut off the water, and when materials reach normal moisture readings gives you a simple record that supports your decisions with data if you ever have to explain them to an adjuster or contractor.
Set up a laundry leak survival kit and inspection routine
A good survival kit turns panic into a checklist. Instead of scrambling for old towels and guessing where the shutoff valve is, you know exactly what to grab and what to do next. This small bit of preparation can prevent secondary damage and also shows your insurer that you acted responsibly if you ever need to file a claim.
What to keep in your laundry leak kit
Start with a sturdy waterproof bin labeled clearly and stored within arm’s reach of your washer. Inside, keep several thick cotton towels or small absorbent pads, a roll of painter’s tape to mark water lines on walls or flooring, disposable nitrile gloves, and a basic pin-type moisture meter. Add a simple printed checklist, a permanent marker, and a notebook or folder for documenting events and storing appliance receipts.
Include a flashlight, extra batteries, and a phone stand or tripod so you can record short videos while shutting off water or showing damage. If your main shutoff is not in the laundry room, add a laminated card with clear directions on how to reach it. Some homeowners also include color-coded tags for hot and cold valves behind the washer so anyone in the household can shut them quickly. This is not overkill. It is how you keep control of the situation before a contractor or property manager even arrives.
Inspection habits that catch problems early
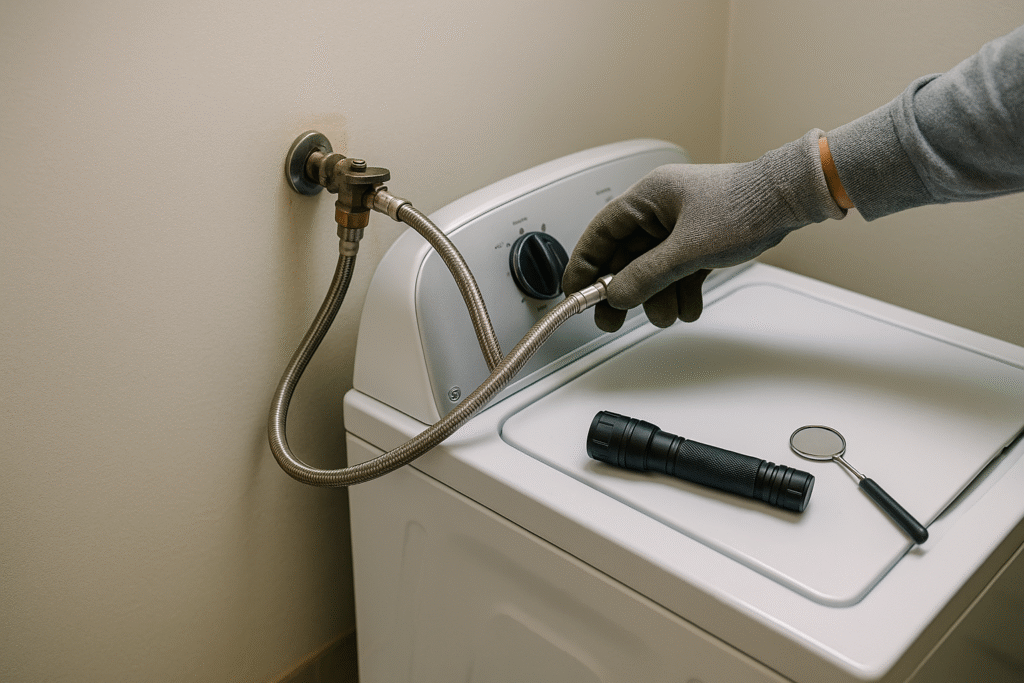
Once your kit is ready, build a routine around it. Every month, turn off the washer, pull it forward a few inches if possible, and check the supply and drain connections with a flashlight. Look for rust, mineral deposits, bulging rubber hoses, or dampness on the wall or floor. Run your moisture meter along baseboards and at the corners of the room, especially in older homes where transitions between floor materials can trap water.
Twice a year, inspect your dryer vent and the exterior vent hood to make sure moist air is actually leaving the house. While you are there, glance at nearby siding and trim for signs of moisture staining that might suggest exhaust problems. Make a note in your log each time you inspect, including photos on your phone. If you ever feel pressured into excessive demolition or drying equipment after a small leak, this record shows the laundry area was regularly maintained and makes it harder for someone to exaggerate how long the problem has been going on.
What to do in the first 24 hours after a washing machine leak
When a leak happens, sequence matters. The fastest way to protect your home is to stop the water, make the area safe, and start controlled drying. Only after that should you call your insurance company or a contractor. Rushing to call first can leave you waiting while water spreads into places that are harder to dry.
Your first hour: stabilize and document
The moment you notice water, shut off the washer and close the hot and cold supply valves behind it. If the leak is severe or you cannot reach the valves safely, use the main house shutoff. Unplug the washer if the outlet is dry and accessible. Then use towels or pads from your kit to block doorways and keep water from reaching adjacent rooms, especially hallways with carpet or wood flooring.
Once the flow is stopped, start documenting. Take wide and close-up photos of all wet areas, including baseboards, under nearby doors, and at floor transitions. Mark the highest reach of moisture on walls with painter’s tape. Note the time in your log. If you later call a contractor, these details make it easier to argue against unnecessary removal of materials that never got wet, and they help an adjuster understand why the drying plan you choose is reasonable.
Hours 2–24: smart drying that matches standards
After the first hour, focus on getting materials dry within one to two days. Move furniture or storage bins out of the wet area. Set up fans to blow air across damp surfaces, not directly into wall cavities. Run a dehumidifier in the room and keep doors to other rooms partly closed so you are drying a defined volume of air. Lift the edges of vinyl rugs or doormats so moisture can escape.
Guidance from federal agencies emphasizes how critical speed is in preventing mold growth. The Environmental Protection Agency notes that drying water-damaged areas and items within 24 to 48 hours greatly reduces the chance of mold taking hold. Their recommendations for fixing water problems promptly and fully drying materials apply just as much to a laundry leak as to larger events. EPA guidance on mold, moisture, and your home discusses this time window and why it matters.
Safe DIY cleanup limits and when to stop
Not every laundry leak requires a crew of technicians and industrial equipment. Small, short-lived events on non-porous surfaces can often be handled by a careful homeowner. The challenge is knowing when a situation is still in that “DIY safe zone” and when hidden moisture or health risks mean you should bring in a professional.
When DIY cleanup is usually reasonable
If the leak was discovered quickly, affected only a small area of hard flooring, and did not soak into walls, insulation, or cabinets, you are usually in good shape to handle it yourself. After stopping the water, you can mop up liquid, use fans and dehumidifiers, and then clean surfaces with a mild detergent solution. If you do find a small patch of visible mold on a hard, non-porous surface, you can generally scrub it away gently while wearing gloves and eye protection, then dry the area completely.
Health agencies describe how to approach modest mold cleanup at home with basic protective gear like gloves, goggles, and an appropriate respirator, especially if you are sensitive to mold. They also stress that materials which stay wet or that are deeply porous, like insulation or heavily soaked drywall, are poor candidates for simple wipe-downs. Guidance from the Centers for Disease Control and Prevention explains that lingering dampness and disturbed spores can be harmful, which is why staying within your limits and drying completely is so important. CDC information on mold and moisture in homes outlines general cleanup and protection advice.
Red flags that call for professional help
Certain signs mean you should strongly consider bringing in a qualified local contractor. These include musty odors that persist days after your drying efforts, visible mold extending beyond a small patch, or any sign that water reached inside walls, adjacent rooms, or lower levels. If your moisture meter still shows elevated readings at baseboards or framing after 48 hours, materials may be drying too slowly. In homes where occupants have asthma, compromised immune systems, or other health concerns, it is wise to be more conservative.
You should also pause DIY efforts if you see signs of structural damage, such as buckling subfloor or separating stair treads near the laundry area. At that point, the question is not just drying but whether elements need to be removed and rebuilt. A reputable contractor can help you decide which materials can be dried in place and which should be removed, and can document conditions in a way that aligns with insurance expectations without overselling work you do not need.
When to call a pro in Minnetonka Beach
Homeowners around Minnetonka Beach deal with a mix of older lakeside homes and newer construction, which means laundry leaks can behave very differently from one house to another. In an older cottage, water may find paths through uninsulated walls and reach crawlspaces. In a newer townhome, it may travel under vinyl plank into adjacent bedrooms. If you are unsure how far water spread or how to open materials without making things worse, that is a good time to call a professional.
A company like Optimized Restoration can inspect with more advanced moisture meters, thermal imaging, and experience reading how water moves in local construction styles. Just as important, a good contractor will explain options instead of pushing one expensive solution. Ask them to show you moisture readings, outline what can be dried in place, and describe where they recommend opening walls or removing flooring and why. This clarity helps you avoid being overcharged for unnecessary demolition or for running equipment longer than your situation requires.
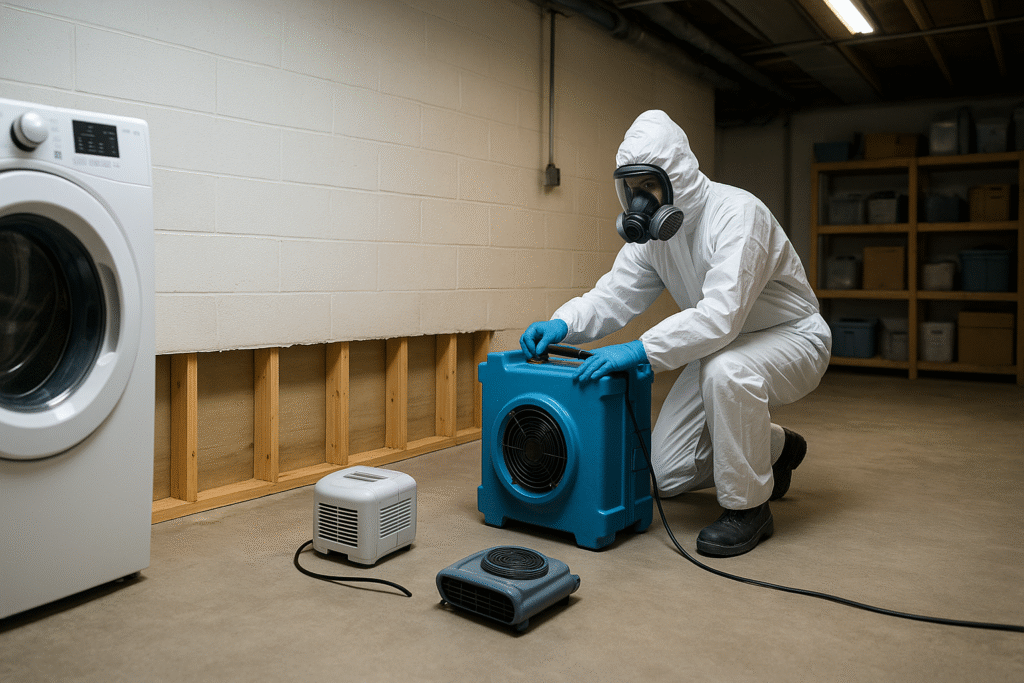
When you talk with a pro, keep your documentation handy. Share your photos, your log of times and actions, and any readings from your own meter. This positions you as a prepared partner rather than a passive customer. For health questions, especially if anyone in the home has breathing problems or mold allergies, it is always a good idea to speak with a medical provider since this guide cannot provide individualized medical advice.
7-step laundry room mold prevention checklist
Keeping mold out of your laundry area is easier when the steps are simple and repeatable. Use this checklist as a once-a-month habit and after any suspicious moisture you notice.
- Look behind and around the washer for drips, rust, or staining at hose connections, shutoff valves, and the wall or floor.
- Run your hand and a flashlight along baseboards and under nearby doors, checking for soft spots, warping, or discoloration.
- Use a small hygrometer to confirm humidity stays under about 60 percent while you do laundry, and closer to 30–50 percent most of the time.
- Inspect washer hoses for bulges, cracks, or stiffness and replace aging rubber lines with quality braided hoses as needed.
- Test the shutoff valves by turning them fully off and on so you know they move freely in an emergency.
- Vacuum lint and dust behind and under the washer and dryer so stray moisture does not cling to debris and feed mold.
- Update your log with inspection notes and photos so you have a clear history if you ever need to explain a leak to a contractor or insurer.
Laundry mold prevention FAQ
How often should I replace washing machine hoses to prevent leaks?
Many homeowners replace standard rubber washer hoses roughly every five years, or sooner if there are signs of cracking, bulging, or rust at the ends. If your laundry room is on an upper level or above finished spaces, it can be worth upgrading to high quality braided hoses and treating that replacement interval as non-negotiable. Regular visual checks during your monthly inspection help you catch issues between replacements, especially in older homes where valves and fittings may be more fragile.
Can I handle small laundry room mold cleanup myself?
For a small leak caught quickly on non-porous surfaces, many people can safely clean up with gloves, eye protection, and a mild detergent solution, followed by thorough drying. If mold appears only as a tiny patch on a hard baseboard or tile and there are no health concerns, careful wiping and monitoring may be enough. You should avoid disturbing larger or hidden growth, mold on porous materials like wet drywall or insulation, or any situation where the smell is strong or spreads beyond the laundry room. In those cases, it is safer to pause and consult a qualified contractor and, if needed, your healthcare provider.
Will my insurance cover a laundry leak and minor mold damage?
Coverage depends on your policy and how your insurer views the cause of loss. Sudden, accidental leaks from a supply hose or valve are more likely to be covered than long-term seepage from an issue that was never maintained. Insurers generally expect you to act quickly to limit damage by shutting off water, drying, and documenting what happened. If you can show that you took reasonable steps and kept up with basic maintenance, you are in a stronger position to discuss what level of cleanup and repairs is appropriate if you choose to file a claim.
By understanding how moisture behaves, building a simple survival kit, and following a consistent routine, you can keep your laundry room from becoming a mold hotspot. The same habits that protect your flooring and trim also protect your health and your budget.
Recommended articles

Mold Liability After Water Damage In Orono: Who Pays When A Finished Basement Grows Mold
A slow seep in a finished basement can turn into a moldy mess and an argument over who pays. This guide walks you through mold liability after water damage, how to sort out responsibility between owners, tenants, HOAs, and contractors, and what to document so you stay in control instead of stuck in a feud.
Kitchen Leak Mold Traps That Make Minnetonka Beach Families Overpay
A slow kitchen leak can quietly grow mold, trigger real mold health risks, and open the door for exaggerated bids and confusing insurance advice. This guide shows you how to protect your family’s lungs and your wallet with a clear kitchen mold action plan and scam-proof checklist.
From Panic To Peace: A Bathroom Mold Cleanup Story In Victoria
A simple upstairs bathroom overflow turned into hidden mold, scary health questions, and a bloated five-figure estimate. This case study walks through what really happened, how the bathroom mold remediation process should look, and the money-saving choices that kept one Victoria family from overpaying.